
It's been a good run with Heroku, but it got a bit too hard to keep everything updated, and I get impatient waiting for free apps to spin-up as well. Perhaps I'll find other uses for Heroku.
Google provides a permanently free VM (alongside several other services, see them here). This is the smallest instance type (f1-micro) that's available on Google Cloud Platform. We get:
- 614 MB of RAM
- 30 GB persistent storage
- 1 GB egress
For a small personal website, this is more than sufficient.
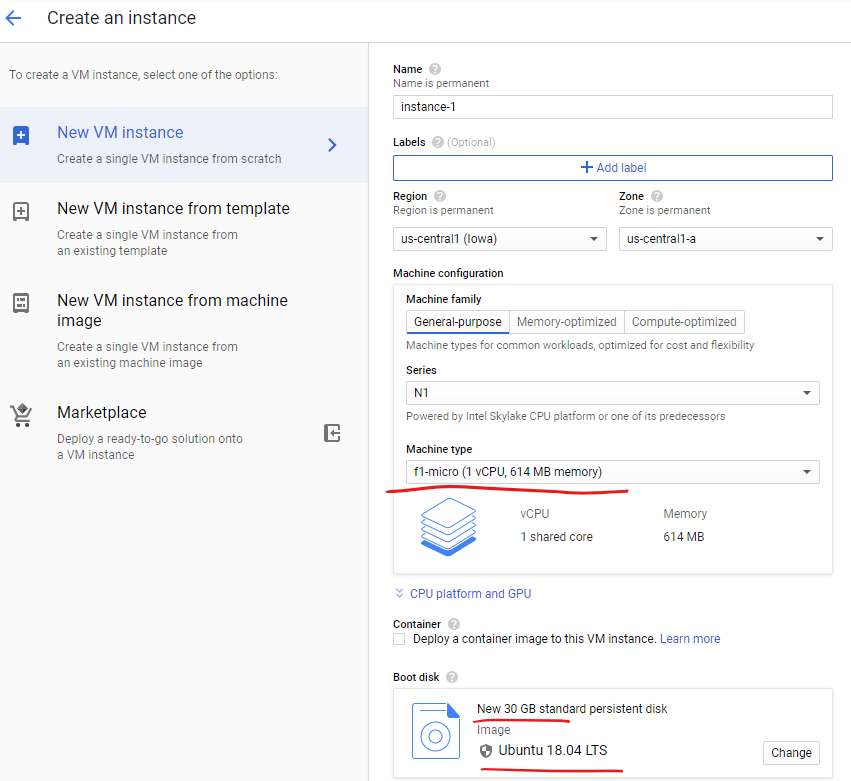
Create VM Instance
This should be pretty straight forward. From GCP console, navigate to Compute Engine and click on "Create and instance". Make sure to select f1-micro and use a disk size of 30GB for things to be free. You should see that this costs approximately $5 a month, but also an additional note saying that the first 744 hours of this instance is free. Follow the on screen instructions and after a few minutes, your instance should be ready!
A static public IP should be assigned as well, and you should set up DNS setting accordingly with your registrar.
Installing Ghost
I chose Ubuntu as my starting image and configuration for most things is a breeze. Detailed instructions on installing Ghost can be found on Ghost's Documentation page, but as always, there's a paste-able block to save time.
# log into your instance with gcloud compute ssh <name>

#Add user (ghost requires a special username ghost, create another to not have conflict
sudo adduser ghost-user
sudo usermod -aG sudo ghost-user

#Install dependencies
sudo apt-get update
sudo apt-get upgrade
# Nginx
sudo apt-get install -y nginx
sudo ufw allow "Nginx Full"
# MySQL
sudo apt-get install -y mysql-server

# Node
# Add the NodeSource APT repository for Node 12
curl -sL https://deb.nodesource.com/setup_12.x | sudo -E bash

# Install Node.js
sudo apt-get install -y nodejs

# Ghost-CLI
sudo npm install ghost-cli@latest -gWith all the software components required, its now time to actually install Ghost. MySQL, in some cases, might require you to have a password, this can be set with:
# To set a password, run
sudo mysql

# Now update your user with this password
# Replace 'password' with your password, but keep the quote marks!
ALTER USER 'root'@'localhost' IDENTIFIED WITH mysql_native_password BY 'password';

# Then exit MySQL
quitFinally, we will install ghost in /var/www as that's the convention.
sudo mkdir -p /var/www/ghost
sudo chown ghost-user:ghost-user /var/www/ghost
sudo chmod 775 /var/www/ghost
cd /var/www/ghost

sudo -u ghost-user -i
ghost installThe install script will ask you several questions. It's pretty straightforward and allowing the script to set up Nginx, MySQL user and database, systemd for automatic startup, etc. Site name and other details isn't important if you are importing from another site.
Updating Ghost
New version is release? Updating is way easier now as we don't need to dance around Heroku's peculiarities.
cd /var/www/ghost
sudo -u ghost-user -i
ghost check-update
ghost upgrade
exitMigrating Content
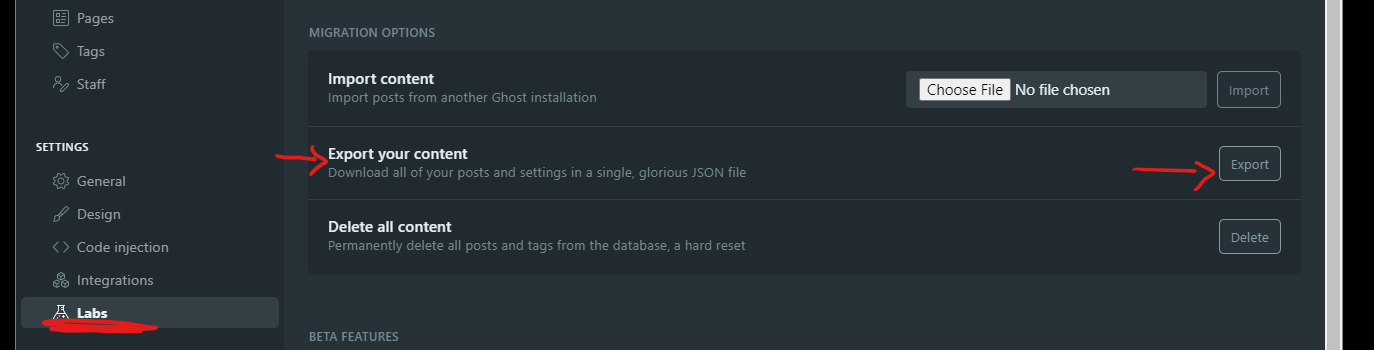
Fortunately, migrating content with Ghost is incredibly painless. Every single configuration and post can be exported as a giant, glorious json file. Just head over to the admin page /ghost/ and click on "Labs". There you should see an option to export your content.
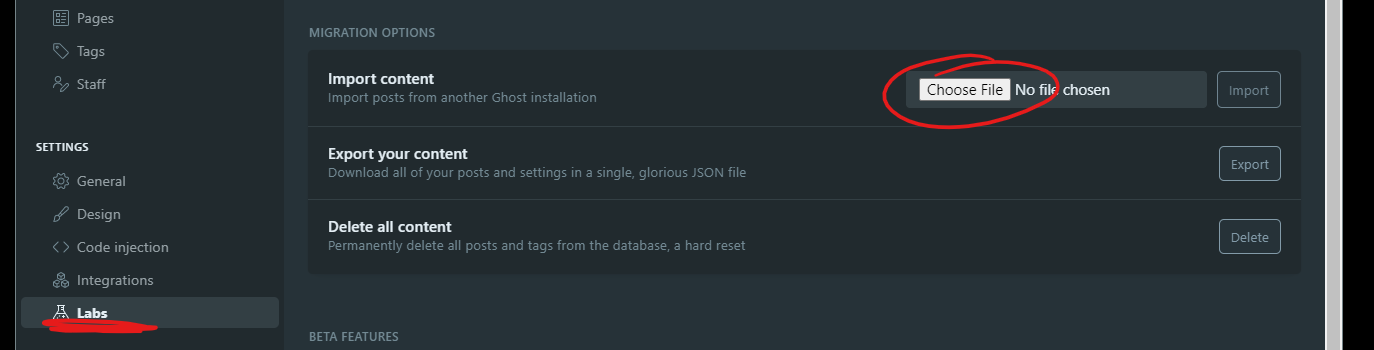
This json file can then be easily imported. Just head to the same "Labs" page on the newly running Ghost website hosted on the free-tier VM.
Performance of the VM
I'm serving quite a few things on the VM, mostly random stuff that I'm experimenting with. For the most part, things run reasonably well. However, occasionally the SQL server seems to quit as memory is very limited. I found it helpful to enable swap. This can be done so easily with dphys-swapfile
sudo apt-get install -y dphys-swapfile

#Configure swap size
sudo vim /etc/dphys-swapfileFinally, Cloudflare's free website plan could also be used to improve overall site performance and some bandwidth. Simply create a free account, add a free website and everything else should be pretty straightforward.